Implement Real-Time Conversions Tracking with Zapier and Google Sheets
Automate the collection and analysis of MomentScience conversion data by integrating with Zapier and Google Sheets. This playbook provides a complete implementation guide for setting up real-time conversion tracking that automatically logs conversion data to Google Sheets for immediate analysis and reporting.
Overview
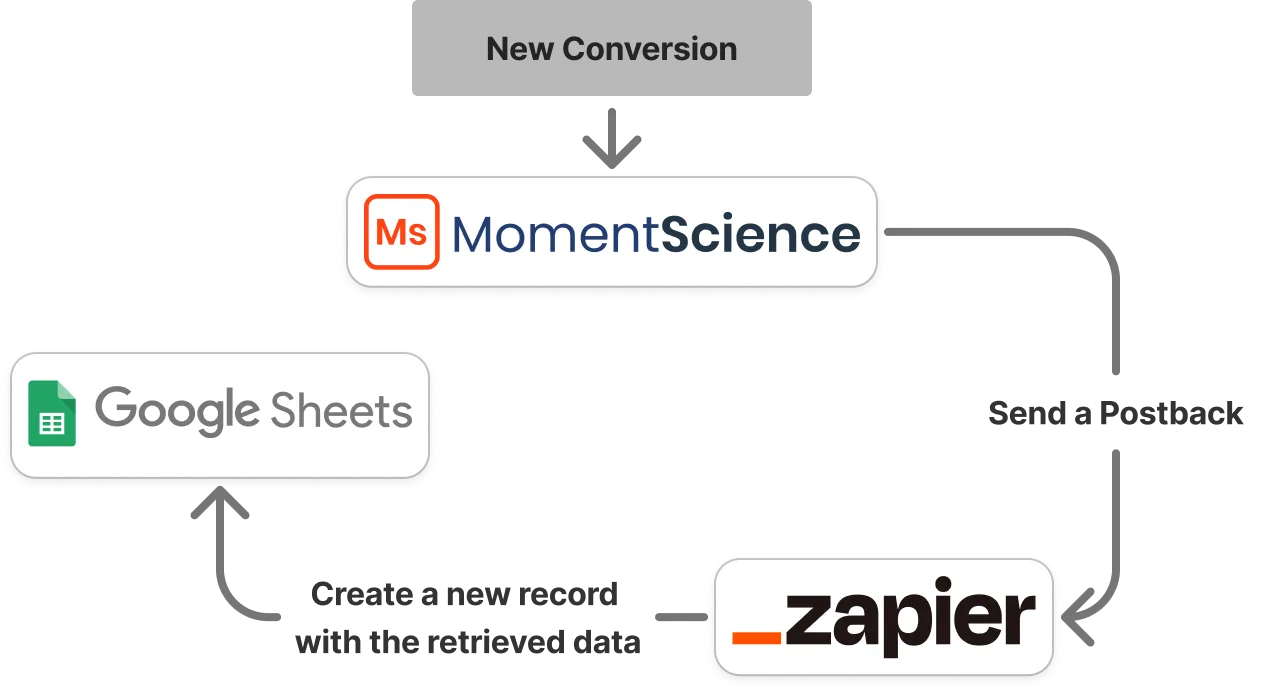
This integration creates an automated workflow that captures every MomentScience conversion event and logs it directly to a Google Sheet in real-time. Using Zapier as the integration platform, you'll establish a reliable data pipeline that requires no ongoing manual intervention.
Postbacks are notifications sent to your designated URL whenever a revenue event associated with an Offer is recorded. Learn more.
Prerequisites
Required Accounts
- MomentScience Account: Ensure you have an active MomentScience account. If you don’t have an account, contact us now.
- Zapier Account: Ensure you have an active Zapier account.
- Access to Google Sheets: Ensure you have access to a Google Sheet to store the records.
Technical Requirements
- Basic understanding of webhooks and data integration
- Administrative access to MomentScience dashboard
- Permission to create and edit Google Sheets
Integration Steps
Have a look at this demo for a quick understanding of how the process will look.
Step 1: Create Zapier Webhook Trigger
Step Goal: Create a New Workflow Triggered by a Conversion Using Zapier Webhook.
Our first step is to set up Zapier. We will create a new "Zap," which is an automated workflow. In this workflow, we will configure a webhook that triggers whenever a new conversion happens within MomentScience.
- Click on the “Create” button and choose “Zaps: Automated Workflow”.
- Now configure your first trigger.
- Select “Webhooks by Zapier”.
- For the event, choose “Catch Hook” and click “Continue”.
- Skip any additional trigger setup steps and click “Continue”.
- In the test section, view and copy the webhook URL provided. This URL will be used to send requests.
- Click on the “Start Testing” button.
For faster setup, use Zapier's AI assistant with this prompt:
"Create a webhook by Zapier that, when triggered, will create a new record in a Google Sheet".
Step 2: Configure MomentScience Postback URL
Step Goal: Connect MomentScience to Zapier by adding the webhook URL as a postback destination.
Next, we need to paste the URL provided by Zapier as a Postback URL in the Publisher’s MomentScience dashboard.
Add Webhook URL to MomentScience
- Access Configuration Settings:
- Log into your MomentScience dashboard
- Configure Postback URL:
- Locate the "Postback URL" field
- Paste the Zapier webhook URL you copied in Step 1
- Ensure the URL is complete and properly formatted
- Save Configuration:
- Click "Save Configuration" to apply changes
- Verify the URL was saved correctly
Test the Connection
- Send Test Data:
- This sends dummy conversion data to Zapier
- Verify in Zapier:
- Return to your Zapier workflow
- Confirm that test data was received
- Review the data structure and field names
- Continue Setup:
- Once test data is confirmed, click "Continue with selected record" in Zapier
Step 3: Configure Zapier Google Sheets Action
Step Goal: Set up Zapier to automatically create new rows in Google Sheets for each conversion.
Once we have set up our webhook URL, we want to ensure that each time the webhook is triggered, a new row is created in a Google Sheet with the conversion data.
Add Google Sheets Action
- Add Action Step:
- In your Zapier workflow, click "Action"
- Search for and select "Google Sheets"
- Choose "Create Spreadsheet Row" as the event
- Authenticate Google Account:
- Connect your Google account to Zapier
- Grant necessary permissions for Google Sheets access
- Verify account connection
Configure Sheet Connection
- Select Target Sheet:
- Choose your Google account
- Select the spreadsheet you created in Step 3
- Choose the specific worksheet (usually "Sheet1")
- Map Data Fields:
- Map webhook data to your Google Sheets columns
- Configure Data Formatting:
- Ensure numeric fields (payout, IDs) are properly formatted
- Set timestamp format for readability
- Configure any data transformations needed
Ensure your Google Sheet has headers that correspond to the data fields you will retrieve from the webhook payload.
Step 4: Test Complete Integration
Step Goal: Verify that the entire workflow functions correctly from MomentScience to Google Sheets.
Once you have configured the Zapier action to record data in your Google Sheet, it is essential to test the setup to ensure everything is working correctly.
Run Complete Test
- Test Zapier Action
- In Zapier, click "Test Step" for the Google Sheets action
- Verify that a new row is created in your Google Sheet
- Check that all data fields are correctly populated
- Verify Data Accuracy
- Confirm field mapping is correct
- Check data formatting and readability
- Ensure no data truncation or errors
- Test with Live Data
- In MomentScience Dashboard, In Postback URL click on "Test" button to send a dummy postback.
- Verify that live data flows through the system correctly
- Check timing and data completeness
Step 5: Publish and Monitor
Step Goal: Activate the integration and establish monitoring procedures.
Publish Zapier Workflow
- Final Review
- Verify all steps are correctly configured
- Test the complete workflow one more time
- Review any error handling or notification settings
- Publish the Zap
- Click "Publish" to activate the workflow
- Confirm the Zap is running and active
- Note the Zap URL and ID for future reference
Conclusion
This integration provides a robust foundation for real-time conversion tracking and analysis. By automating data collection from MomentScience into Google Sheets via Zapier, you create a scalable system that grows with your business needs.
The real-time nature of this integration enables immediate insights into conversion performance, helping you make data-driven decisions quickly. As your data collection needs evolve, this foundation can be extended to include additional data sources, more sophisticated analysis, and integration with enterprise business intelligence tools.
Next Steps:
- Monitor your integration performance over the first week
- Establish regular data review and analysis procedures
- Consider expanding to additional data destinations or analysis tools
- Explore advanced MomentScience features that can enhance your tracking
For questions or assistance with this integration, contact our support team at [email protected].