Automating Customer Engagement: Integrating MomentScience with Klaviyo
Automate customer engagement and email marketing by integrating MomentScience with Klaviyo. This playbook provides comprehensive instructions for setting up automated user profile creation, email list subscription, and engagement workflows based on conversion events.
Overview
This integration creates an automated customer engagement system that captures converting users from MomentScience and automatically adds them to Klaviyo for targeted email marketing campaigns. The system enables real-time customer onboarding and sophisticated lifecycle marketing automation.
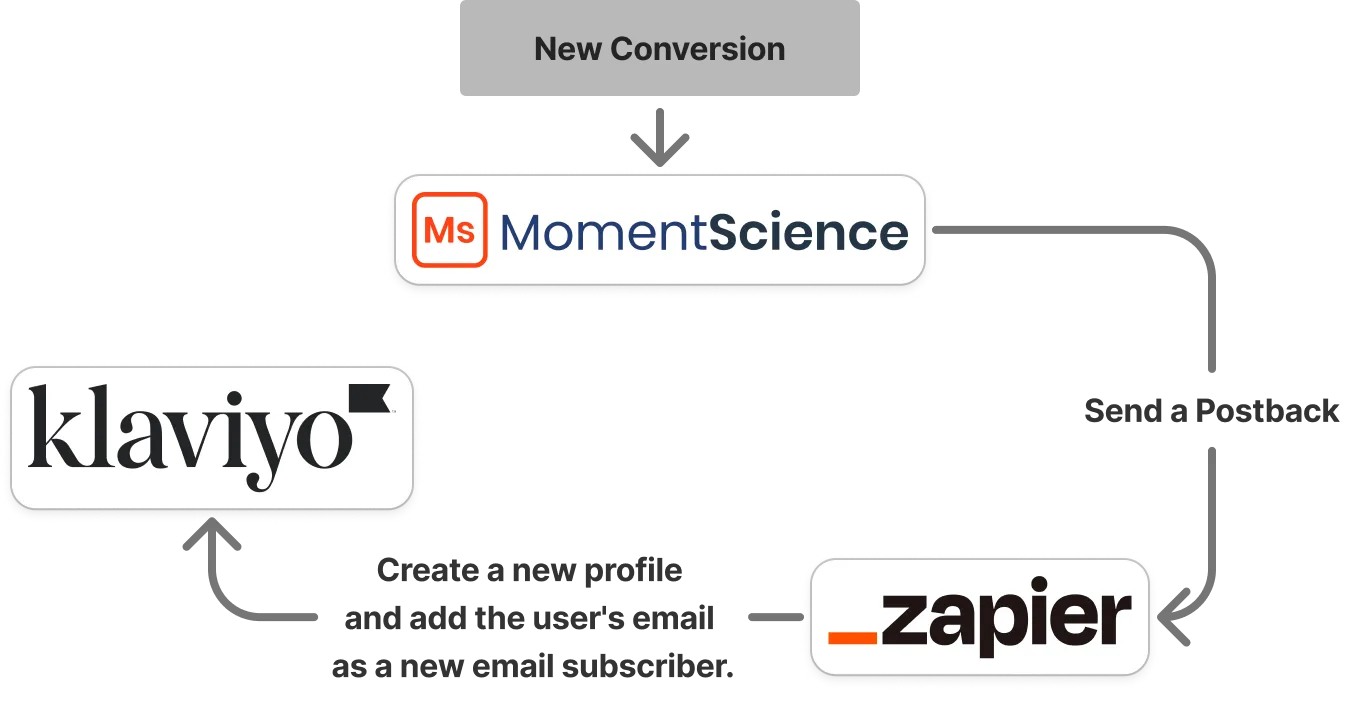
The integration uses MomentScience postbacks to trigger automated workflows in Zapier, which then create or update customer profiles in Klaviyo and subscribe them to targeted email lists.
Prerequisites
Implementation Guide
Have a look at this demo to get a quick understanding of how the process will look.
Step 1: Configure Zapier Webhook Trigger
Step Goal: Create a Zapier workflow that receives conversion data from MomentScience.
Here’s how to set up a "Zap," an automated workflow in Zapier that starts when a new conversion occurs in MomentScience:
- Access Zapier Dashboard
- Click "Create" → "Zaps: Automated Workflow"
- Set Up Webhook Trigger
- Search for and select "Webhooks by Zapier"
- Choose "Catch Hook" as the trigger event
- Click "Continue" to proceed with configuration
- Configure Webhook Reception
- Skip optional trigger setup steps
- Copy the provided webhook URL (starts with https://hooks.zapier.com/hooks/catch/)
- Important: Save this URL securely for MomentScience configuration
- Prepare for Data Reception
- Click "Start Testing" to enable webhook reception
- Keep this browser tab open while configuring MomentScience
Use Zapier's AI assistant for faster configuration by using this prompt:
"Create a webhook by Zapier that, when triggered by a conversion event, will create or update a customer profile in Klaviyo and subscribe them to an email marketing list."
Step 2: Connect MomentScience to Zapier
Step Goal: Configure MomentScience to send conversion data to your Zapier webhook.
Follow these steps to link Zapier with MomentScience by adding the webhook URL as a Postback URL:
- Access MomentScience Configuration
- Log into your MomentScience dashboard
- Add Webhook URL
- Locate the "Postback URL" field
- Paste the Zapier webhook URL from Step 1
- Verify the URL is complete and properly formatted
- Save Configuration Settings
- Click "Save Configuration" to apply changes
- Confirm the URL appears correctly in the settings
Test the Integration Connection
- Send Test Conversion Data
- Click to send dummy conversion data to Zapier
- This validates the connection between platforms
- Verify Data Reception in Zapier
- Return to your Zapier workflow configuration
- Confirm that test data was received successfully
- Review the data structure and available fields
- Proceed with Configuration
- Once test data is confirmed in Zapier
- Click "Continue with selected record" to proceed
Step 3: Prepare Klaviyo Environment
Step Goal: Set up Klaviyo lists and profile structure to receive automated data from conversions.
Configure Email Lists
- Create Target Email Lists
- Create dedicated lists for MomentScience conversions:
- "MomentScience Converters" (main list)
- Segment-specific lists by advertiser, offer type, or value
- Lifecycle-based lists (new customers, high-value customers)
- Configure List Settings
- Set appropriate double opt-in requirements
- Configure list descriptions and management settings
- Establish unsubscribe and compliance settings
Define Customer Profile Structure
- Standard Profile Fields
- Email address (required)
- First name and last name
- Phone number (if available)
- Customer ID from MomentScience
- Custom Properties for Conversion Data
- Conversion timestamp
- Offer ID and name
- Advertiser information
- Payout amount and currency
- Conversion source and campaign
Step 4: Configure Klaviyo Integration in Zapier
Step Goal: Set up automated profile creation and list subscription in Klaviyo based on conversion events.
With the webhook URL in place, the next step is to configure Zapier so that each time the webhook is triggered, the user’s profile is created in Klaviyo, and their email is subscribed to a specific list.
Add Klaviyo Action
- Add Klaviyo to Workflow
- In your Zapier workflow, click "Action"
- Search for and select "Klaviyo"
- Click "Continue" to proceed
- Choose Klaviyo Event Select the appropriate action based on your goals:
- "Create or Update Profile": Best for comprehensive profile management (Recommended)
- "Subscribe Profile": Focus on email/SMS subscription only
- "Create Profile": For new customer acquisition only
Authenticate Klaviyo Connection
- Connect Klaviyo Account
- Click to authenticate your Klaviyo account
- Grant necessary permissions for profile and list management
- Verify successful connection to your Klaviyo account
- Test API Connection
- Confirm Zapier can access your Klaviyo lists
- Verify profile creation permissions
Configure Profile Creation and List Subscription
- Select Target List
- Choose the primary email list for subscribers
- Select "MomentScience Converters" or your designated list
- Configure list membership settings
- Configure Subscription Settings
- Set email subscription consent status
- Configure SMS subscription if phone numbers available
- Set subscription source attribution
- Define consent timestamps and method
Step 5: Test Complete Integration
Step Goal: Test the automation to ensure that each time a conversion occurs, the data is sent to Klaviyo and the user receives a subscription confirmation email.
Execute Integration Test
- Test Klaviyo Action in Zapier
- Click "Test Step" for the Klaviyo action
- Verify successful profile creation or update
- Confirm data mapping accuracy
- Verify Results in Klaviyo
- Locate the test profile created by Zapier
- Verify all data fields populated correctly
- Confirm list subscription status
- Test Email Subscription Flow
- Check if confirmation email was sent (if double opt-in enabled)
- Verify subscription status in profile details
- Test unsubscribe functionality
Step 6: Publish and Monitor Integration
Step Goal: Activate the integration and establish monitoring procedures.
Publish Zapier Workflow
- Click "Publish" to activate your Zap
- Confirm the workflow status shows as "On"
- Note the Zap ID and settings for documentation
Further Customization
To enhance your integration, you can also link user profiles and data to a Google Sheet by adding an additional action in Zapier.
- Add Google Sheets as an Action:
- In Zapier, add a new Action step and search for “Google Sheets.”
- Configure the Event:
- Select the “Create Spreadsheet Row” event.
- Set up this action to log the conversion data from the payload into a Google Sheet.
For detailed instructions on this process, refer to theImplement Real-Time Conversions Tracking with Zapier and Google Sheets playbook.
Conclusion and Next Steps
This comprehensive integration creates a powerful automated customer engagement system that transforms MomentScience conversions into targeted email marketing opportunities. By implementing this integration, you establish a foundation for sophisticated customer lifecycle marketing that grows with your business.
📢 If you're running into any issues while going through the integration process, feel free to contact us at [email protected]