Direct Offer Conversion Tracking (OmniSDK)
Overview
This guide walks you through setting up conversion tracking with MomentScience using Google Tag Manager (GTM).
Prerequisites
Before you begin, ensure you have:
- Your MomentScience account ID
- Your landing page URLs
- Your conversion page URLs
Integration Steps
Step 1: Configure accountId Data Variable in GTM
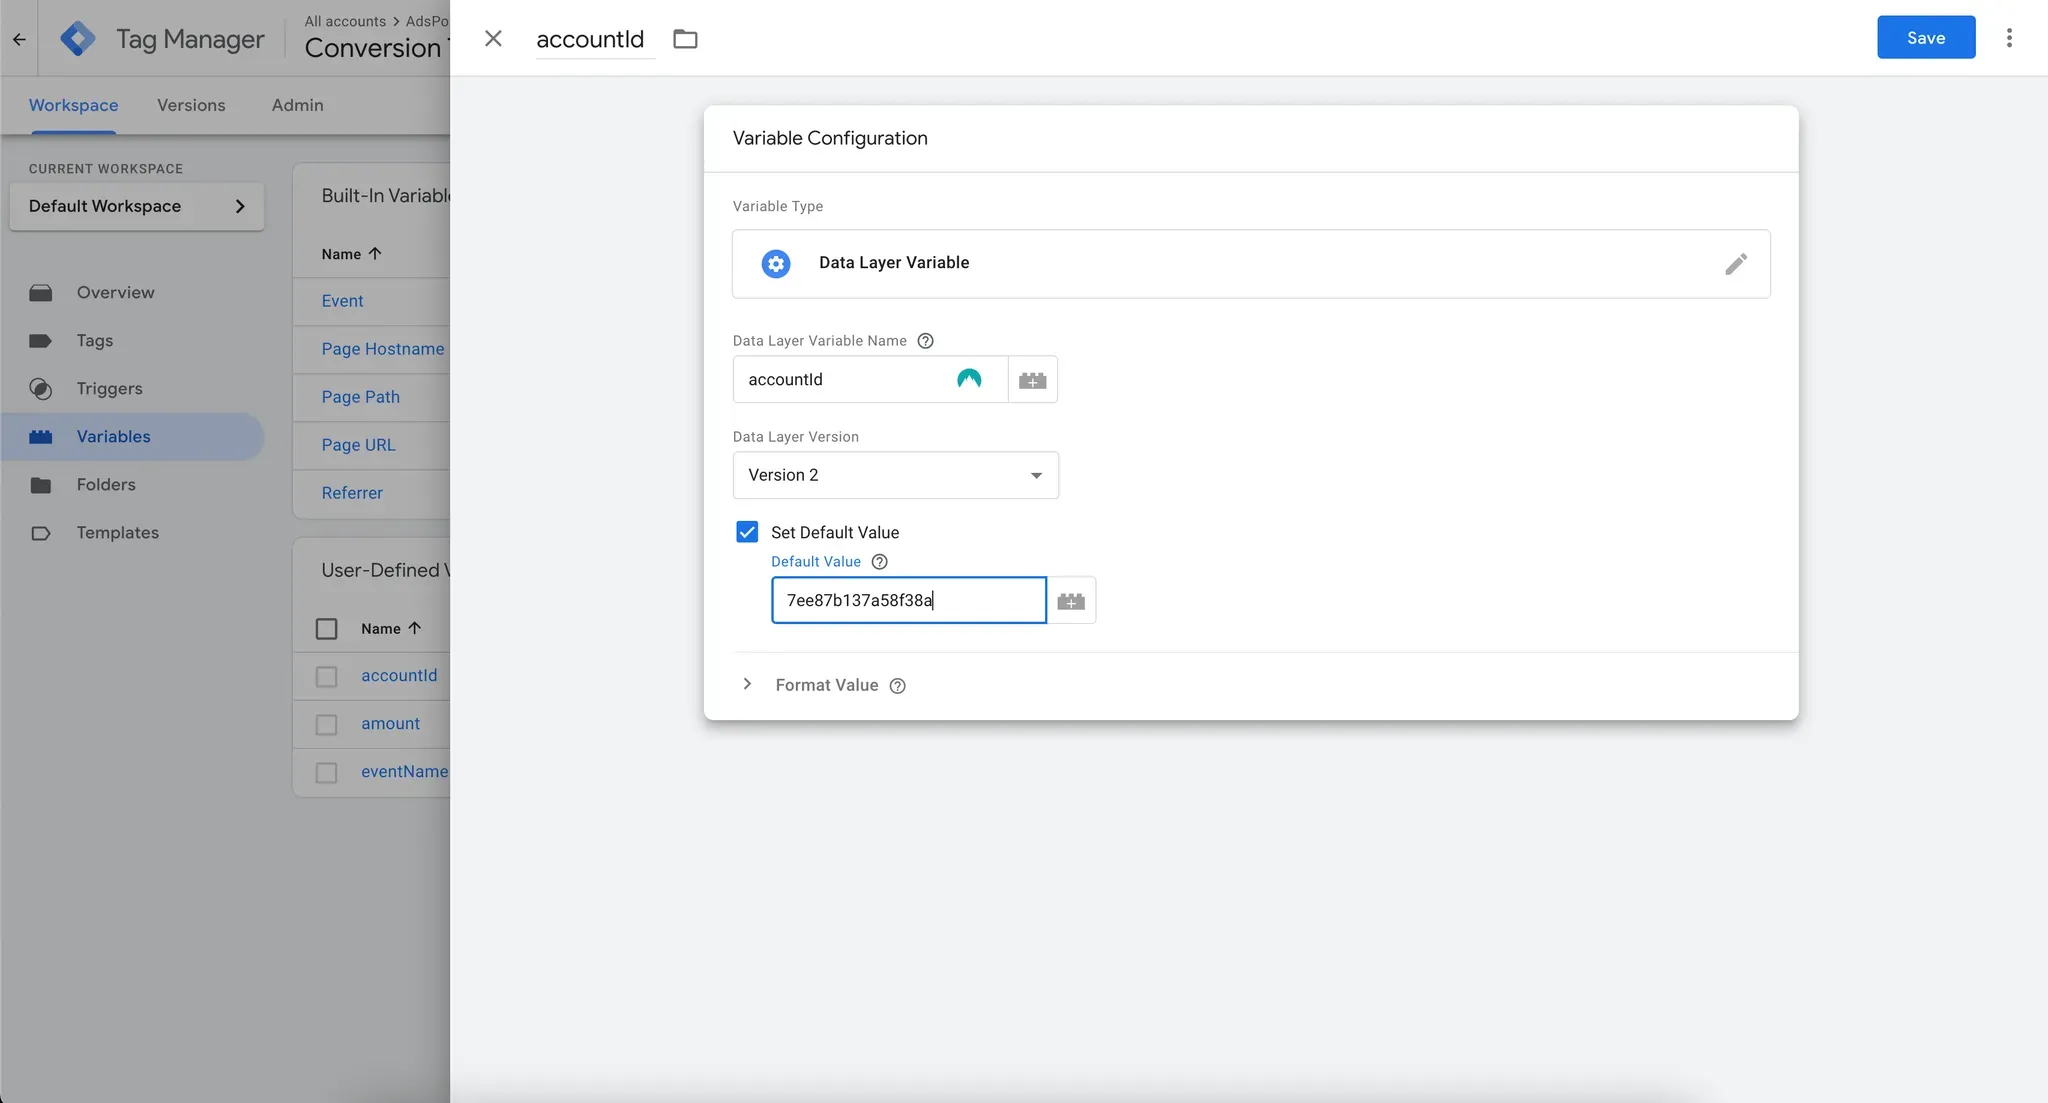
To ensure MomentScience tracking works across all pages, you need to create a Data Layer Variable for your account ID.
- In Google Tag Manager, navigate to Variables.
- Create a new variable of type Data Layer Variable.
- Name it accountId.
- Check "Set Default Value" and enter your MomentScience account ID as the default.
📌 This ensures your account ID is accessible throughout your GTM setup.
Step 2: Add the MomentScience OmniSDK Tag
The MomentScience OmniSDK is required for tracking user interactions and conversions.
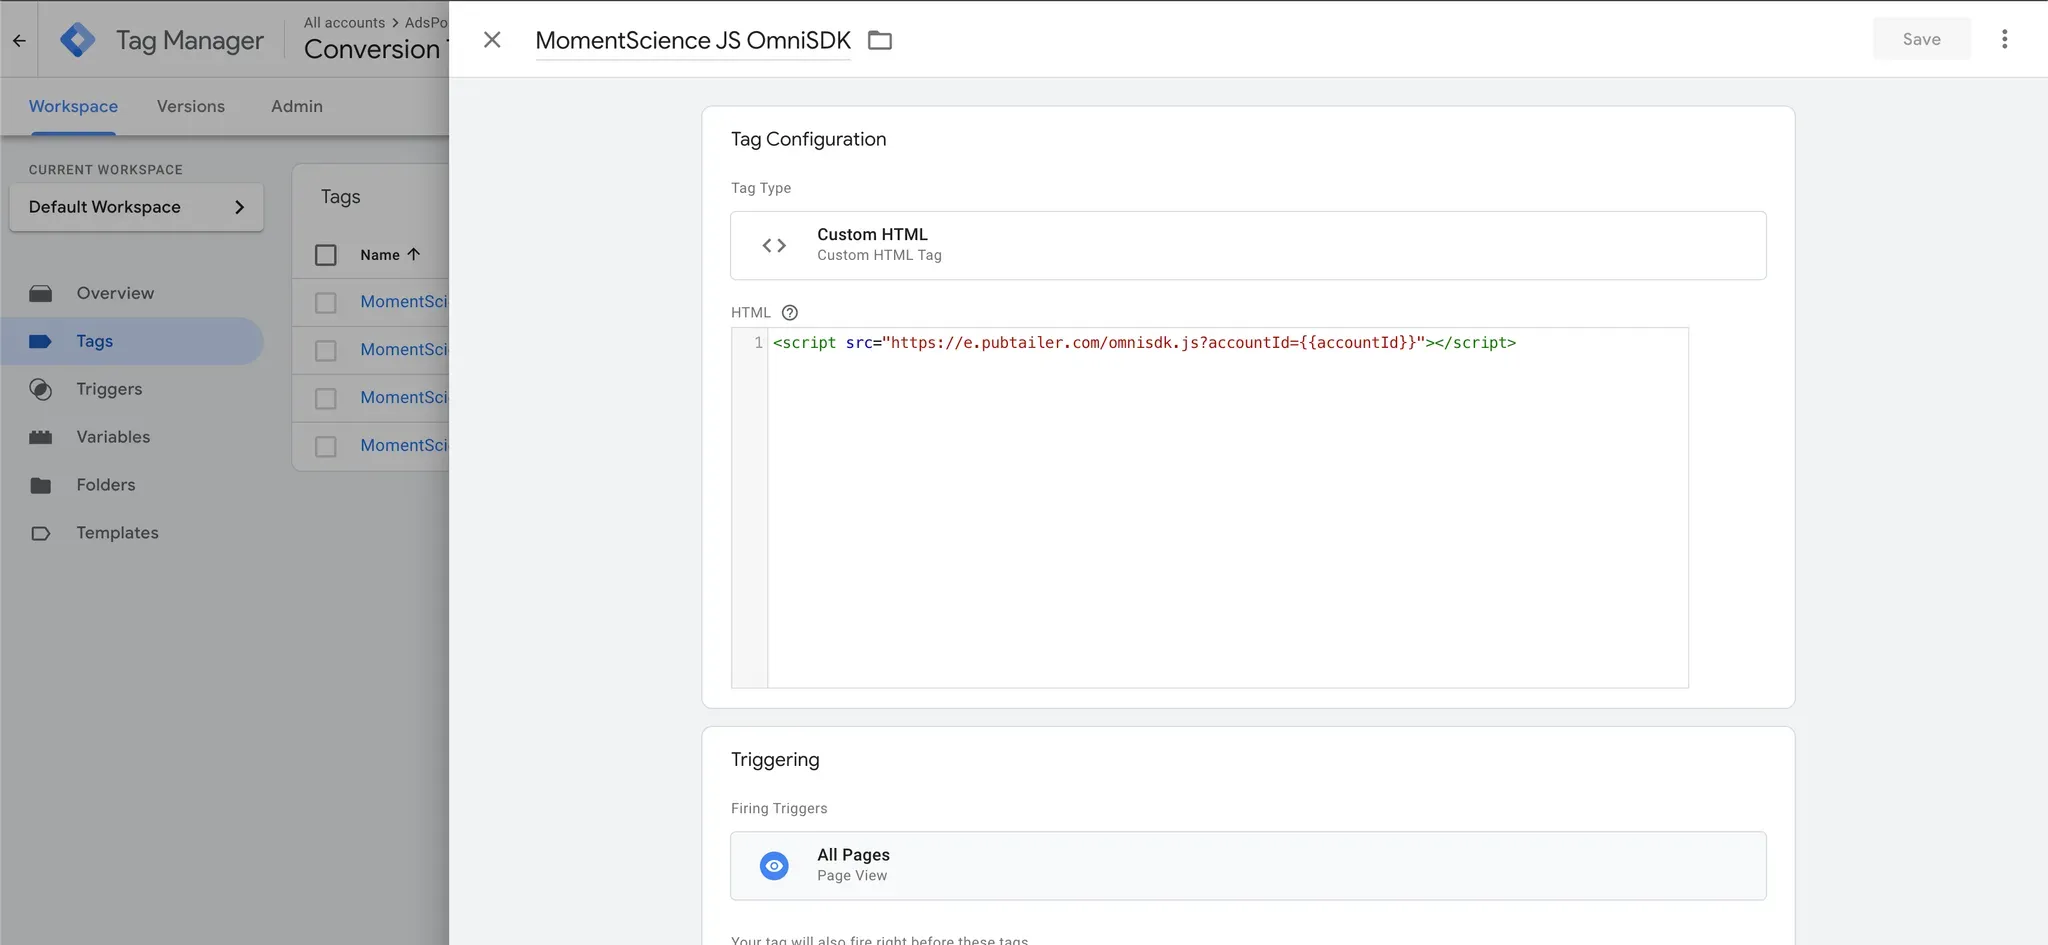
- In GTM, go to Tags and create a new tag of type Custom HTML.
- In the HTML field, enter the following:
//📌 {{accountId}} references the Data Layer Variable from Step 1.
<script src="https://plugins.pubtailer.com/omnisdk.js?accountId={{accountId}}"></script>- Set the trigger to fire on all pages.
- Save and publish your changes.
✅ This ensures that the OmniSDK is loaded on every page of your site for tracking purposes.
Step 3: Implement Click Tracking on Landing Pages
- In GTM, create another tag of type Custom HTML.
- Enter the following code:
<script>
// This code simply looks for a click identifier in the
// URL and saves to local cookie for later retrieval
// on conversion.
    handleAdpxClickId();
</script>- Set the tag firing option to Once per page.
- Under Tag Sequencing, select "Fire tag before..." and choose the OmniSDK tag from Step 2.
- Under Triggers, configure the tag to fire only on landing pages.
📌 This tag ensures that click IDs are properly captured for attribution.
Step 4: Implement Conversion Tracking on Key Event Pages
This step will guide you through setting up a Custom HTML Tag in GTM that fires only on pages where you want to track conversion events (e.g., purchases, signups, or registrations).
A. Create Data Layer Variables for Events
Before configuring the tag, we need to define two Data Layer Variables to hold:
- The event name (e.g., conversion, purchase, lead).
- The event value (e.g., the transaction amount).
Steps to Create Data Layer Variables
- In Google Tag Manager (GTM), go to Variables → New.
- Create a Data Layer Variable with the following settings:
- Variable Name: eventName
- Set Default Value: "conversion"
- Create another Data Layer Variable:
- Variable Name: amount
- Set Default Value: 0
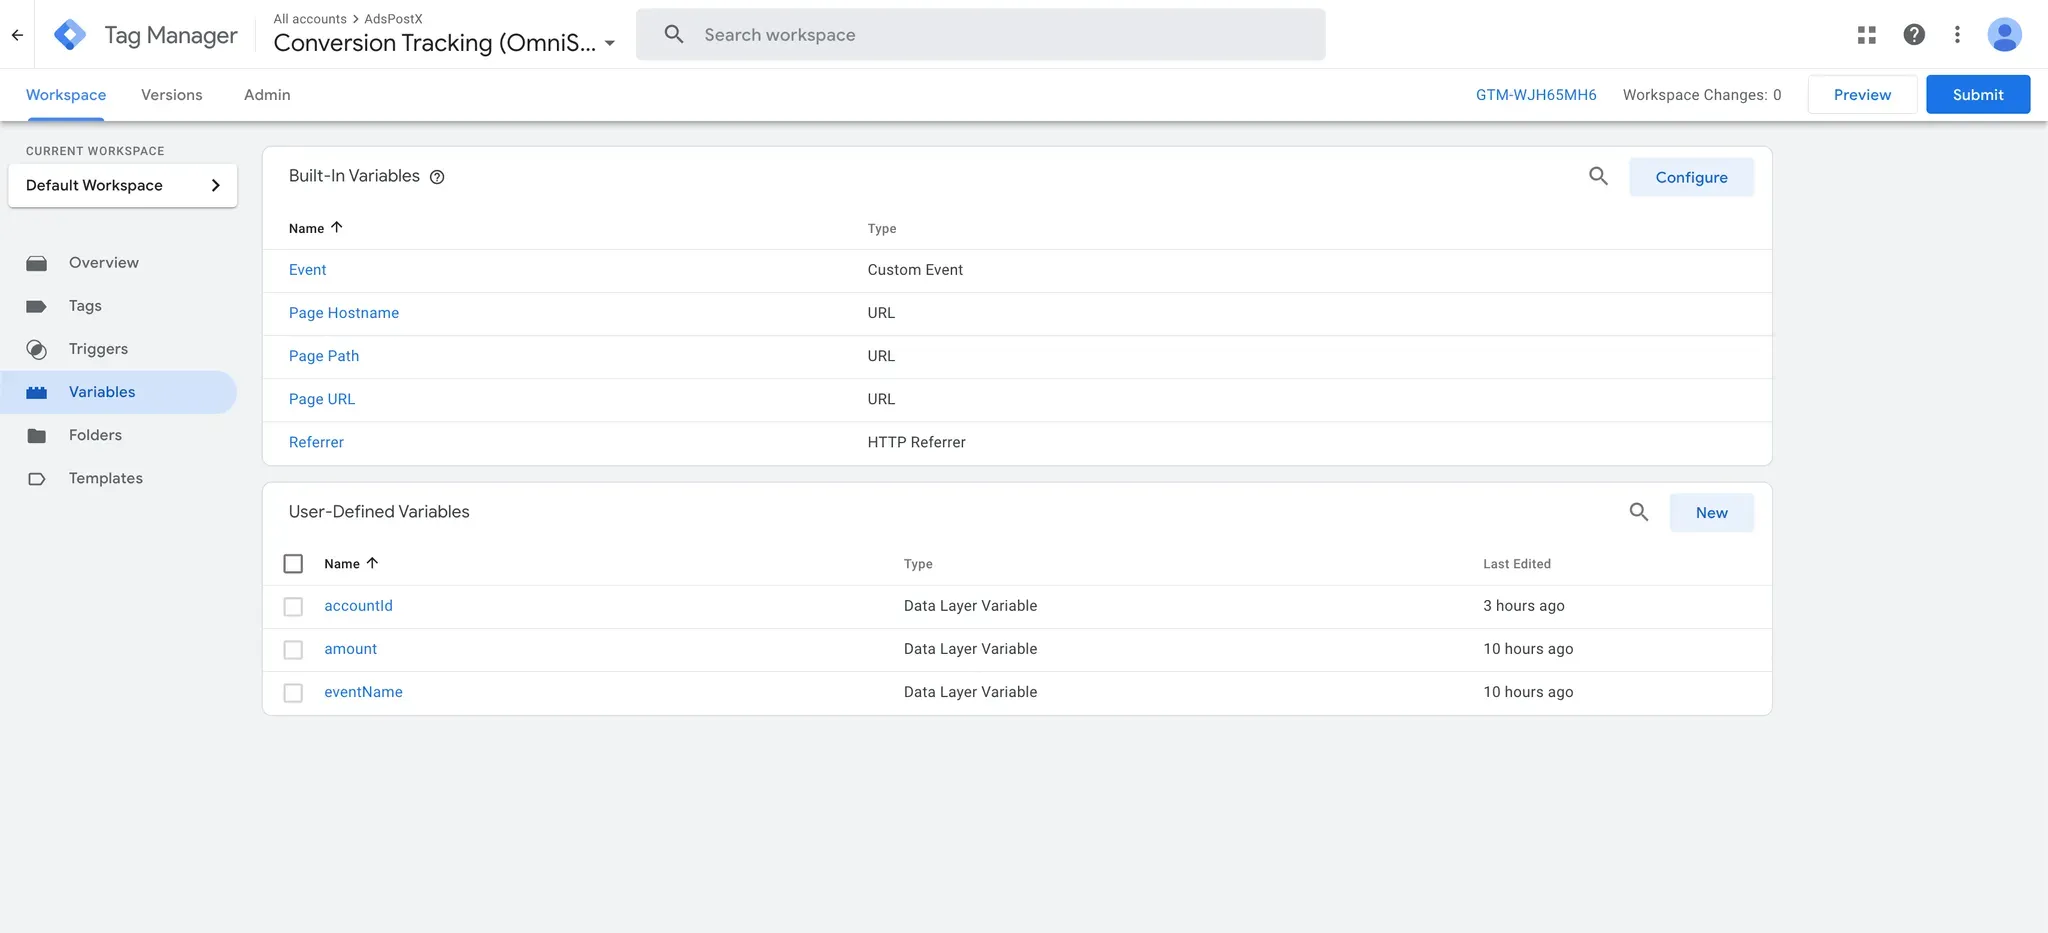
When you’re done, you should have 3 user-defined variables of type Data Layer.
📌 Ensure these variables exist before proceeding to the next step.
B. Set Up the Conversion Tracking Tag
- In GTM, go to Tags and create a new tag of type Custom HTML.
- Enter the following JavaScript code:
<script>
(function() {
    var sale_amount = {{amount}}; // Replace with actual sale amount (if available)
    // Main Tracking
    //get mosci_click_id from cookie (captured on landing page
    // and saved local to site)

    var mosciClickId = getCookie('mosci_click_id');
    var eventName = '{{eventName}}'; ///replace with actual event name

    trackMoSciEvent(mosciClickId, eventName, sale_amount)
        .then(function() {
            console.log('Tracking successful');
        })
        .catch(function(error) {
            console.error('Tracking failed:', error);
        });

    //Alt Tracking
    //Get adpx_click_id from cookie
    var adpxClickId = getCookie('adpx_click_id');

    trackEvent(adpxClickId, sale_amount)
        .then(function() {
            console.log('Tracking successful');
        })
        .catch(function(error) {
            console.error('Tracking failed:', error);
        });
})();
</script>- Set the tag firing option to Once per page.
- Under Tag Sequencing, select "Fire tag before..." and choose the OmniSDK tag you set up in Step 2.
- Under Triggers, configure the tag to fire only on conversion pages.
📌 This script tracks conversions by capturing stored click IDs and sending them back to MomentScience.
Step 5: Configure Data Layer Variables on Your Website
To ensure Google Tag Manager (GTM) can correctly track conversions, you must pass Data Layer Variables on your site’s pages. This section explains how to include these variables in your website’s <head> section.
A. Configure Data Layer Variables on Landing Pages
On all landing pages, insert the following code above your GTM implementation in the<head> tag:
<script>
    window.dataLayer = window.dataLayer || [];
    dataLayer.push({
    //📌 Replace YOUR_ACCOUNT_ID with your actual MomentScience account ID.
        'accountId': 'YOUR_ACCOUNT_ID'
    });
</script>
This ensures that your account ID is available in the Data Layer, allowing GTM to access it across different tracking tags.
B. Configure Data Layer Variables on Conversion Pages
On all conversion pages (e.g., checkout success, registration complete), insert the following code above your GTM implementation in the<head> tag:
<script>
    window.dataLayer = window.dataLayer || [];
    dataLayer.push({
//📌 Replace accountId with your actual MomentScience account ID.
        'accountId': 'YOUR_ACCOUNT_ID',
//📌 Replace EVENT_NAME with the actual event type (lead, cart, purchase, registration, etc.).
        'eventName': 'EVENT_NAME',
// 📌 Replace amount with the conversion value (if applicable).
        'amount': 100
    });
</script>
C. Handling Multiple Conversion Events
If your site includes multiple conversion events (e.g., add-to-cart → purchase), repeat the Data Layer push on each relevant page. For example:
- Cart Page (/cart) → Track when users add items to their cart:
<script>
    window.dataLayer = window.dataLayer || [];
    dataLayer.push({
        'accountId': 'YOUR_ACCOUNT_ID',
        'eventName': 'cart',
        'amount': 0
    });
</script>
- Purchase Confirmation Page (/thank-you) → Track completed purchases:
<script>
    window.dataLayer = window.dataLayer || [];
    dataLayer.push({
        'accountId': 'YOUR_ACCOUNT_ID',
        'eventName': 'purchase',
        'amount': 250
    });
</script>
A live working example can be found here.
Final Checklist
Step 1: accountId is configured as a Data Layer Variable.
Step 2: OmniSDK tag is firing on all pages.
Step 3: Click tracking tag is firing only on landing pages.
Step 4: Conversion tracking tag is firing only on conversion pages.
Step 5: Data Layer Variables are implemented correctly on your website.
Conclusion
By following these steps, you have successfully integrated MomentScience conversion tracking using Google Tag Manager. This setup ensures accurate tracking of user conversions while keeping your implementation scalable and flexible.
📢 If you're running into any issues while going through the integration process, feel free to contact us at help@momentscience.com